Practical Malware Analysis - Lab 9 write-up
Since Chapter 8 did not include any lab assignments, we continue this series with Chapter 9: OllyDbg. From this Chapter we (obviously) learned about OllyDbg usage, but also about rebasing, debugging DLLs, debugging techniques (such as tracing), and analysing shellcode. We finally picked up enough skills to revisit a malware sample that we got stuck on in Chapter 3. Let’s go!
Lab 9-1
Analyze the malware found in the file Lab09-01.exe using OllyDbg and IDA Pro to answer the following questions. This malware was initially analyzed in the Chapter 3 labs using basic static and dynamic analysis techniques.
1. How can you get this malware to install itself?
Answer: This was quite a painful process to get through. I remembered from the Chapter 3 labs that this sample required additional command line arguments in order to install itself, with one possible argument being “-in”. The “-in” option would make most sense, since it could stand for “install”.
OllyDbg makes it easy to debug programs with additional arguments, as you can see in the screenshot below.
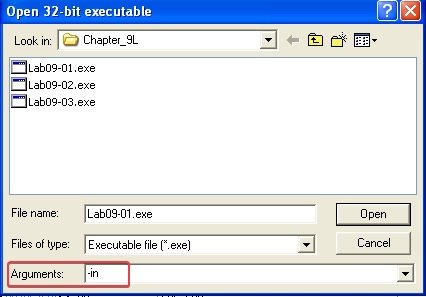
You can also pass arguments from the Debug –> Arguments option in the menu at the top of the program. Anyhow, when debugging the program we eventually notice that it deletes itself by calling ShellExecuteA @ 0x004024EE with the /c del [PATH TO LAB09-01.EXE] parameters passed to cmd.exe. So the “-in” argument is not correct.

One thing that is interesting about this malware is that it starts at 0x00403896, instead of the regular 0x00400000 base address of executables. We can see this in the Exports window when we view the program in IDA Pro:

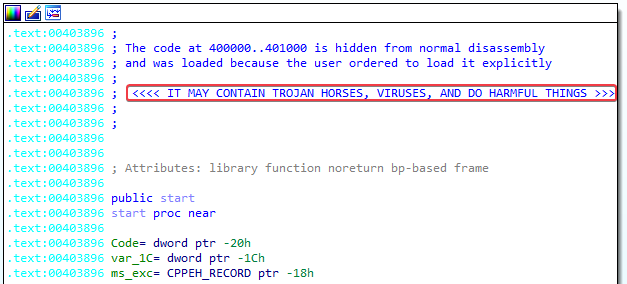
When we open this function, IDA even gives us a warning that this may contain trojan horses, viruses, and do harmful things:
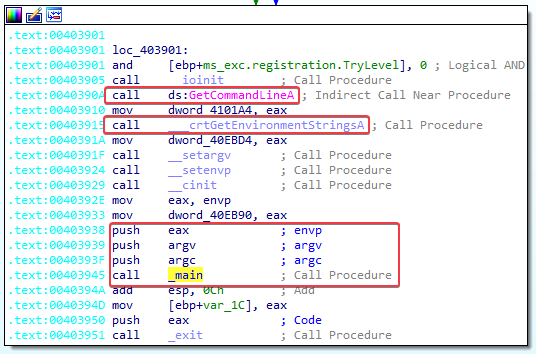
Further examination of this function shows that it looks at command line arguments supplied to the program and the environment strings. It pushes these onto the stack before calling main:
When main is called, it compares argc (number of arguments) to 1. This is followed by a jnz instruction (Jump Not Zero). So if the result of this comparison is zero (this means that there is only 1 argument) we do not take the jump to short loc_402B1D. Instead, we take the path of the red arrow. Note that the program itself (Lab09-01.exe) counts as the first argument. So if there are no additional arguments, we take the path of the red arrow (not taking the jump).
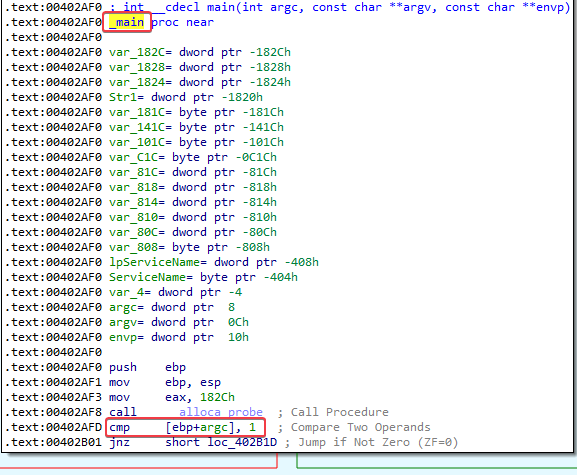
We already know that this malware will not install itself without the correct arguments specified, and if we follow the path of the red arrow we also see that ShellExecuteA eventually gets called.

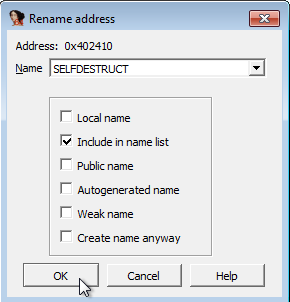
When we debugged the program we already learned that this call is used to delete itself (note that the memory address 004024EE is the same as in the debugger). This function has a few other xrefs, so I am renaming it to “SELFDESTRUCT” to make analysis easier:
If we follow the path of the green arrow, we see that argc (argument count: int that stores the number of command-line arguments passed, including the name of the program) and argv (argument vector: array of character pointers listing all the arguments) are referenced before a new function is called.
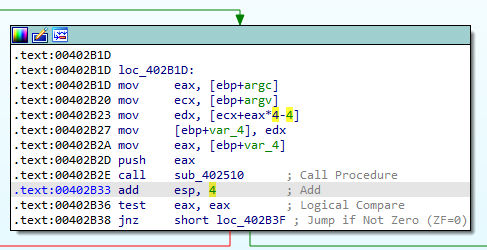
Notice the mov edx, [ecx+eax*4-4] instruction @ 00402B23. This accesses the last element in argv. This element is passed to the sub_402510 function as a parameter. Since it seems like this function would check for the correct argument being passed, I set a breakpoint on the call instruction @ 00402B2E in OllyDbg. I then checked what would happen if I ran the program with the command-line arguments “-in blabla”.
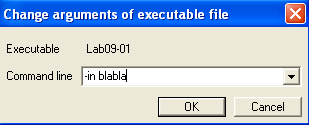
When we hit our breakpoint, we see that “blabla” is passed as a parameter to the new function:

Stepping through the new function, we eventually hit a CMP ECX, 4 instruction @ 00402524:

In the registers view, we see that ECX contains 6. It looks like the program is checking for the number of characters that are in our second command-line argument (blabla). It is expecting a total of 4 characters, as with out 6 character input we eventually hit the SELFDESTRUCT function again…
So let’s try again by running the program with the command-line arguments “-in 1234”:
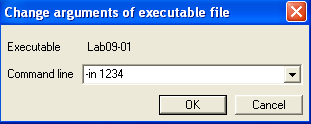
This time, ECX is equal to 4. So we will take the jump to 0040252D.

Here we eventually hit a CMP EDX, 61 instruction. EDX contains 31 with our input, and we eventually hit the SELFDESTRUCT function again. Note that 0x31 is “1” in ASCII. So the first character in our second command-line argument is being checked against 0x61 here!

Since 0x61 is “a” in ASCII, I ran the program again with the command-line arguments “-in a234”. This lead to taking the jump to 00402542.

Now, these instructions might be a bit unclear at first sight. But if you step through the program you will notice that it subtracts the hex value of character 2 from the hex value of character 1. As mentioned before, 0x61 is “a”. 0x32 is “2”, so in this case the program will subtract 0x61 from 0x32. We do not take the jump @ 0040255A, since the result of this subtraction is not equal to 1.
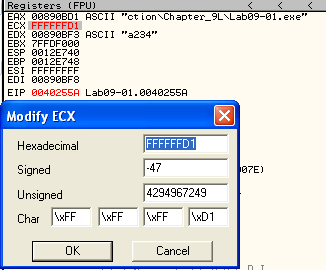
You can confirm that 0x32 - 0x61 is FFFFFFD1 (or -47 in decimal) by using a hex calculator.
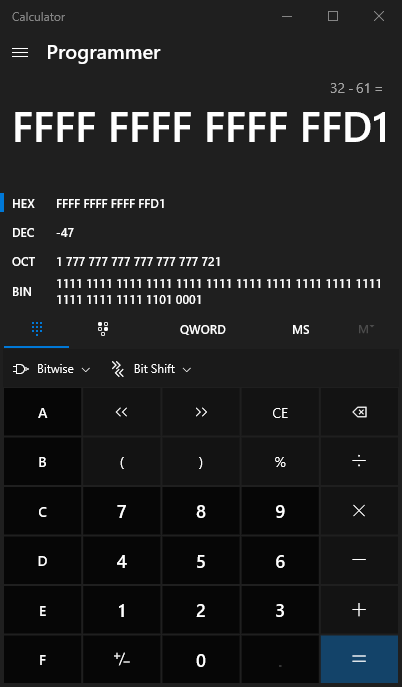
To take the jump, we will need to get a result of 1 from this subtraction instruction. 0x62 - 0x61 = 1, so the second character must be “b” since “b” is the ASCII value for 0x62!
Let’s try again by running the program with the command-line arguments “-in ab34”.
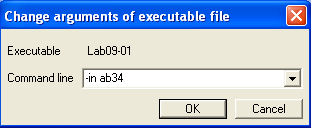
And we can see that we successfully take the jump.
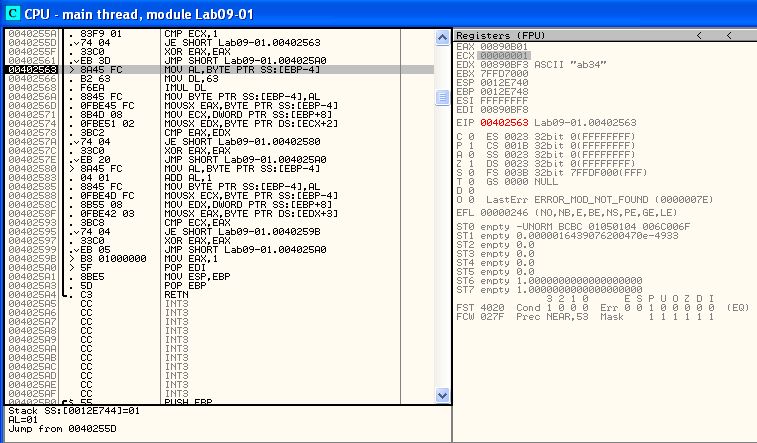
At this set of instructions we see a reference to 0x63, which is “c” in ASCII. Could this be our next character?
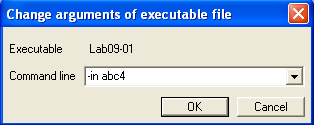
EAX and EDX now both contain 0x63. We take the jump!
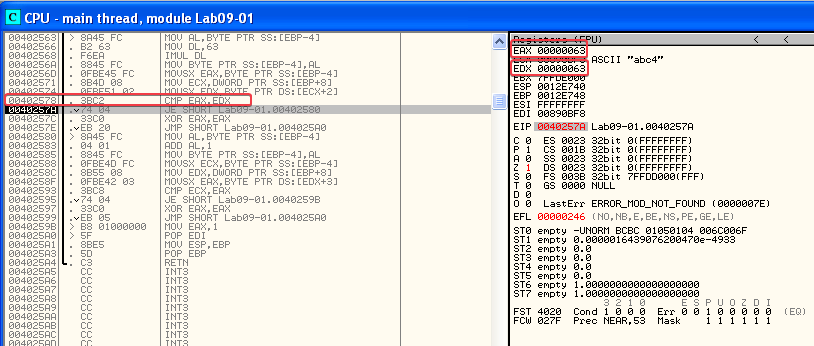
At the next set of instructions, 0x1 gets added to 0x63 and our final character is compared against the result. Since 0x64 is “d” in ASCII we now know the full password: “abcd”!
Now we can finally answer this question. To get the malware to install itself, we have to supply it with the command-line arguments: “-in abcd”.
2. What are the command-line options for this program? What is the password requirement?
Answer: All of the command-line options can actually be seen when running the malware in a debugger. They can be found in the memory dump window. The command-line options are:
-cc-c-re-in
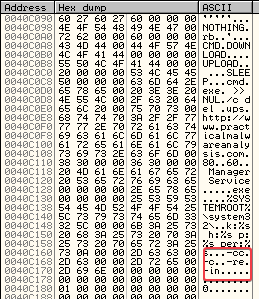
The password requirement is abcd, as already mentioned in the previous answer.
3. How can you use OllyDbg to permanently patch this malware, so that it doesn’t require the special command-line password?
Answer: In IDA, you can easily notice that the password checking function always returns 0 if the password is incorrect by XORing EAX with EAX. If the password is correct, “1” gets moved into EAX before returning:

So to get the program to not require a special command-line password, you could patch the “xor eax, eax” instruction to “mov eax, 1”. This way the program will always return 1 and continue executing.
4. What are the host-based indicators of this malware?
Answer: The host-based indicators of this malware are:
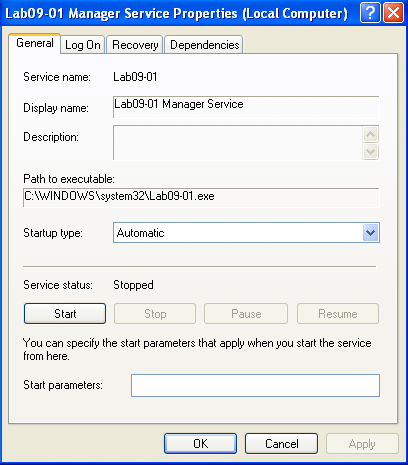
HKLM\SOFTWARE\Microsoft \XPS- Notice the space after Microsoft!
HKLM\SYSTEM\ControlSet001\Services\Lab09-01\SecurityHKLM\SYSTEM\CurrentControlSet\Services\Lab09-01\Security- Service named
Lab09-01 Manager Service C:\WINDOWS\system32\Lab09-01.exe


5. What are the different actions this malware can be instructed to take via the network?
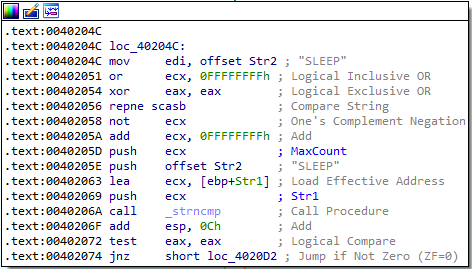
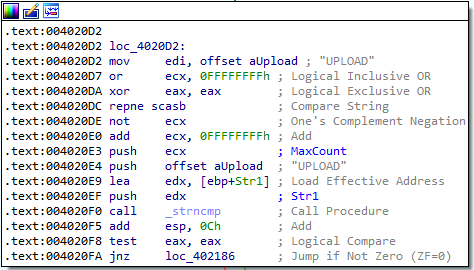
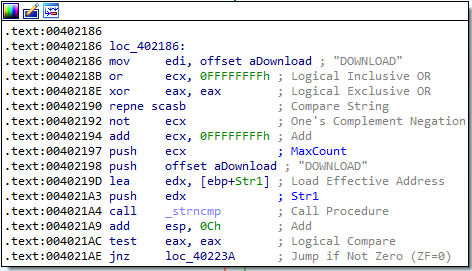
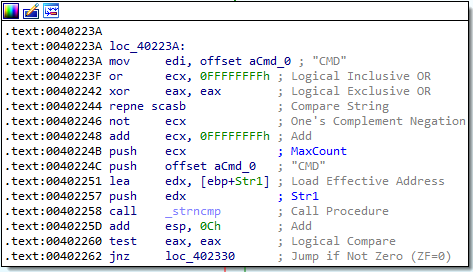
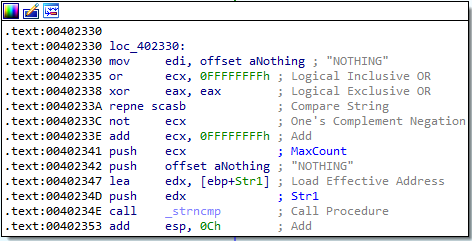
Answer: These commands can be found in the sub_402020 function in IDA. They are:
SLEEPUPLOADDOWNLOADCMDNOTHING
6. Are there any useful network-based signatures for this malware?
Answer: The network-based signature for this malware is:
http://www.practicalmalwareanalysis.com
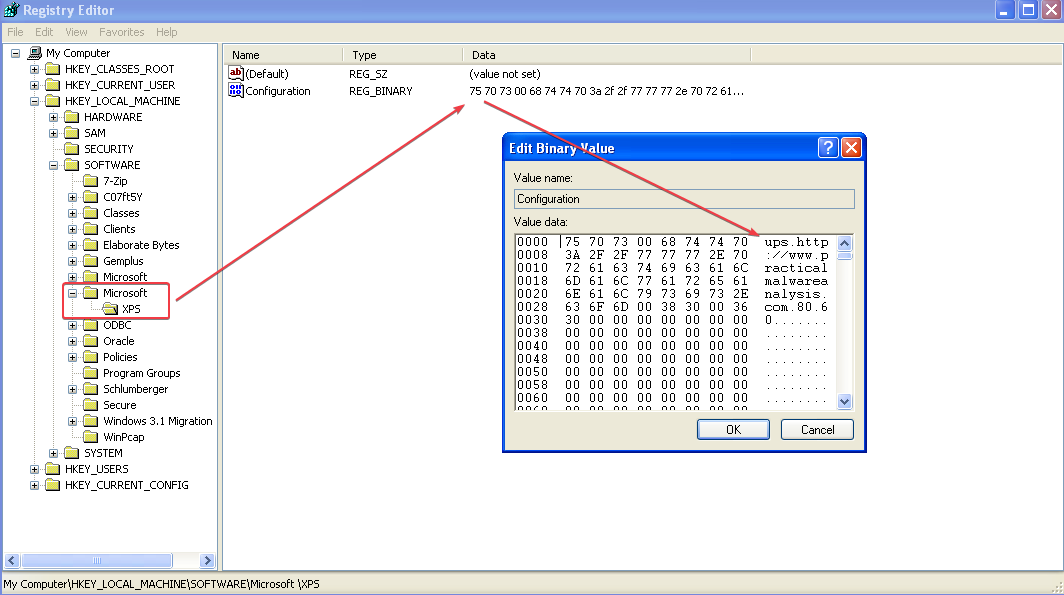
Comparing my answers to the Lab 9-1 solutions
Conclusions after comparison:
- The command-line options that I mentioned in question 3 were correct, but I forgot to note what each option does:
-in- Installs a service
-re- Removes a service
-c- Updates the malware configuration in the registry
-cc- Reads the current configuration from the registry and formats it into a string which is printed to the console
- I also forgot to mention what each network command does…
SLEEP- Sleeps for the specified amount of seconds
UPLOAD- Creates a specified file on the local system by connecting to the remote host over a specified port
DOWNLOAD- Reads a specified file and sends it to the remote host over a specified port
CMD- Executes the specified shell command with cmd.exe and sends the output to the remote host over a specified port
NOTHING- Does nothing
Lab 9-2
Analyze the malware found in the file Lab09-02.exe using OllyDbg to answer the following questions.
1. What strings do you see statically in the binary?
Answer: The only interesting string I see when statically looking at the program is cmd.
2. What happens when you run this binary?
Answer: Nothing happens. The program exits right away.
3. How can you get this sample to run its malicious payload?
Answer: When debugging the program, I noticed that it references its file name Lab09-02.exe multipe times. Eventually, we can see it pushing both Lab09-02.exe and ocl.exe onto the stack before calling a strcmp function:

We know that this is a strcmp function, because if we search for the same address in IDA we can see that it has been nicely labeled for us:

If we rename the program to ocl.exe, it actually executes its malicious payload!
4. What is happening at 0x00401133?
Answer: We see two strings being initialized in this area. One string contains “1qaz2wsx3edc” and the other string contains “ocl.exe”.
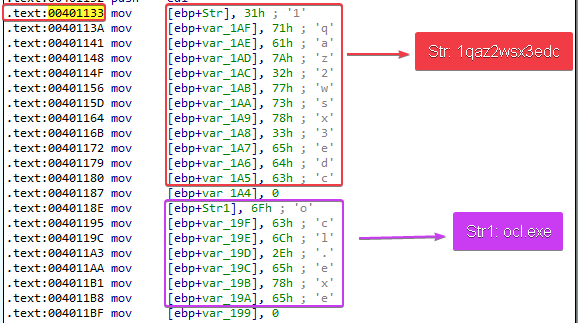
5. What arguments are being passed to subroutine 0x00401089?
Answer: Before the subroutine is called, we see that var_1F0 and Str are pushed onto the stack.

We already know that Str contains “1qaz2wsx3edc”. var_1F0 does not seem to contain anything interesting yet, but when we look at it in OllyDbg it holds a memory address which points to some kind of encoded string:
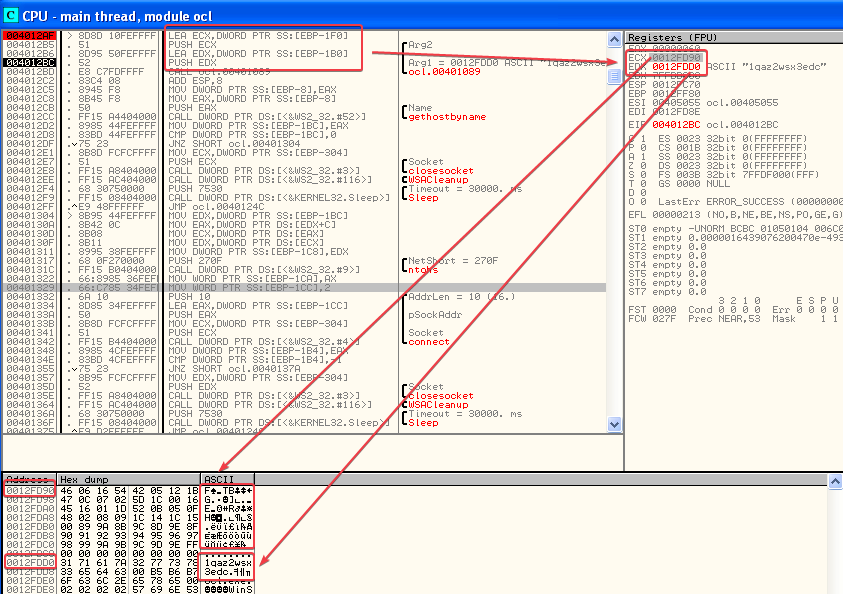
When we step through the sub_401089 function in OllyDbg we see that it returns an interesting URL!

6. What domain name does this malware use?
Answer: www.practicalmalwareanalysis.com
7. What encoding routine is being used to obfuscate the domain name?
Answer: The domain is encoded with a XOR routine.
8. What is the significance of the CreateProcessA call at 0x0040106E?
Answer: Before this call, a socket is created in order to connect to practicalmalwareanalysis.com on port 9999. The CreateProcessA call points all input and output of cmd.exe to this socket. This means that a reverse shell is created in order to receive commands from the attacker.
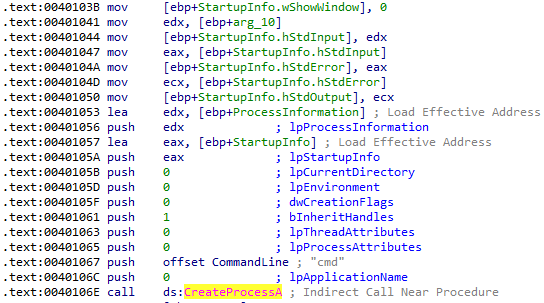
Comparing my answers to the Lab 9-2 solutions
Conclusions after comparison:
- No differences here!
Lab 9-3
Analyze the malware found in the file Lab09-03.exe using OllyDbg and IDA Pro. This malware loads three included DLLs (DLL1.dll, DLL2.dll, and DLL3.dll) that are all built to request the same memory load location. Therefore, when viewing these DLLs in OllyDbg versus IDA Pro, code may appear at different memory locations. The purpose of this lab is to make you comfortable with finding the correct location of code within IDA Pro when you are looking at code in OllyDbg.
1. What DLLs are imported by Lab09-03.exe?
Answer: If we look at the import table of Lab09-03.exe, we see that the following DLLs are imported:
DLL1DLL2KERNEL32NETAPI32.dll
When viewing the import table, we also see that the LoadLibraryA function of KERNEL32 is used. This function can be used to dynamically load additional DLLs.
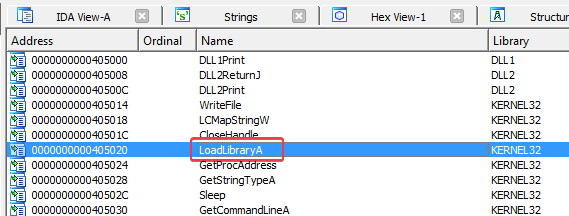
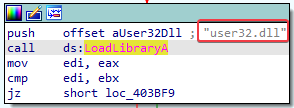
Looking at the xrefs to LoadLibraryA, we learn that there are two additional DLLs being loaded by Lab09-03.exe:
DLL3.dlluser32.dll

2. What is the base address requested by DLL1.dll, DLL2.dll, and DLL3.dll?
Answer: 0x10000000
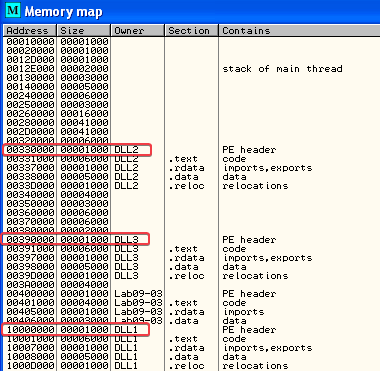
3. When you use OllyDbg to debug Lab09-03.exe, what is the assigned based address for: DLL1.dll, DLL2.dll, and DLL3.dll?
Answer: The assigned base addresses are:
0x00330000for DLL20x00390000for DLL30x10000000for DLL1
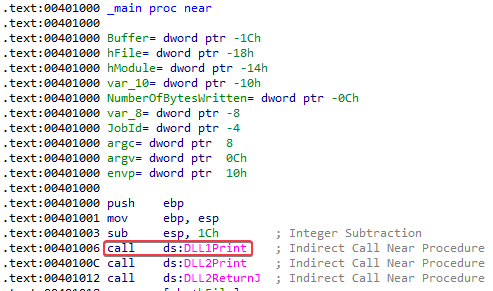
4. When Lab09-03.exe calls an import function from DLL1.dll, what does this import function do?
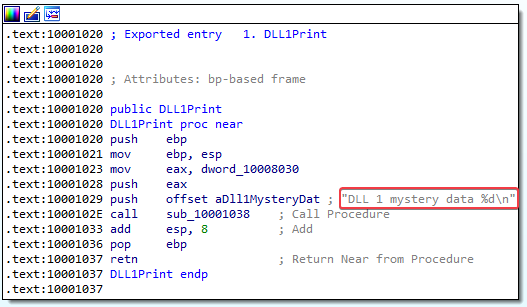
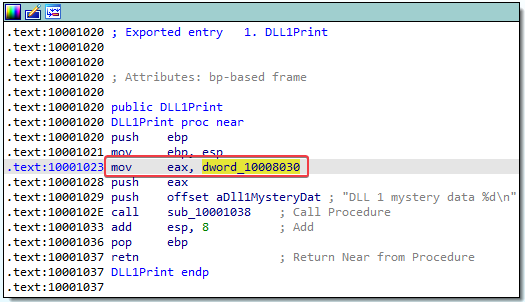
Answer: It calls DLL1Print, which prints “DLL 1 mystery data %d” onto the screen. Note that %d is a format specifier for decimal integers, so this “mystery data” is probably a number.
5. When Lab09-03.exe calls WriteFile, what is the filename it writes to?
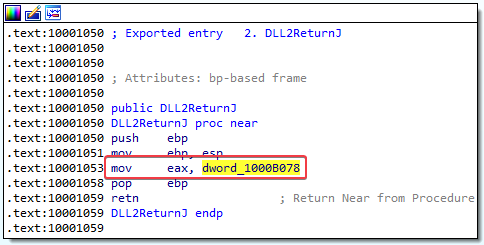
Answer: We can see that WriteFile is called after calling DLL2ReturnJ. The return value from this DLL2ReturnJ call is stored in hFile, which is pushed onto the stack before calling WriteFile.

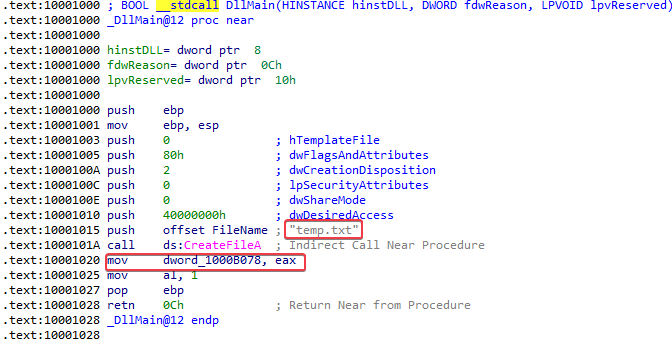
The DLL2ReturnJ function stores a dword into EAX before returning. If we look at the DllMain function, we learn that this dword is temp.txt. So the filename that it writes to is: temp.txt
6. When Lab09-03.exe creates a job using NetScheduleJobAdd, where does it get the data for the second parameter?
Answer: Looking at the NetScheduleJobAdd function, we see that it takes 3 parameters: Servername, Buffer, and JobId.
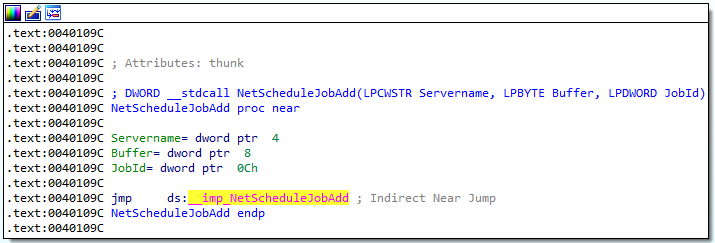
The second parameter is Buffer. According to Microsoft documentation for the NetScheduleJobAdd function, this is a pointer to an “AT_INFO” structure describing the job to submit. This struct contains the following information:

Before the call to NetScheduleJobAdd we see a reference to DLL3GetStructure:
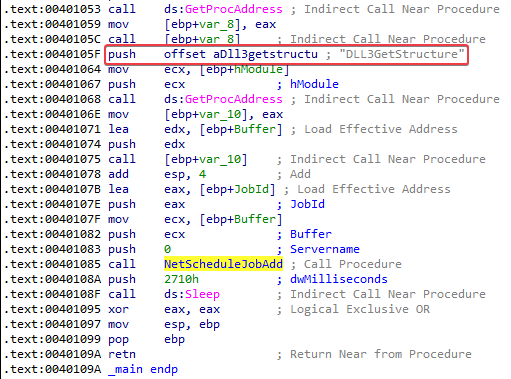
Since DLL3 contains a command and a reference to a structure, I am going to assume that NetScheduleJobAdd gets its data for the Buffer parameter from here.
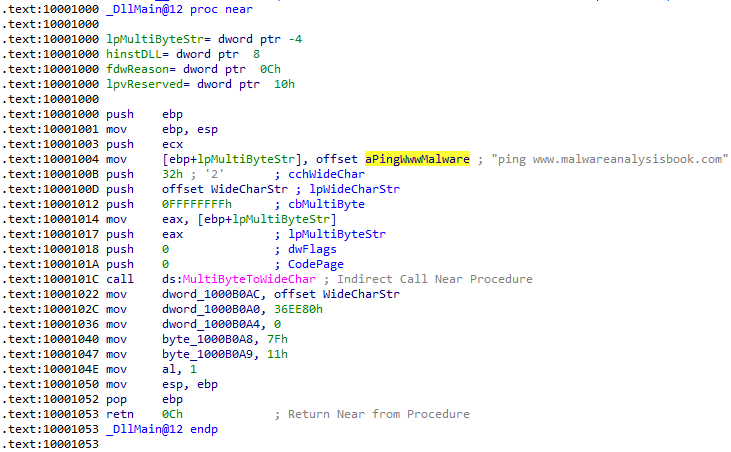
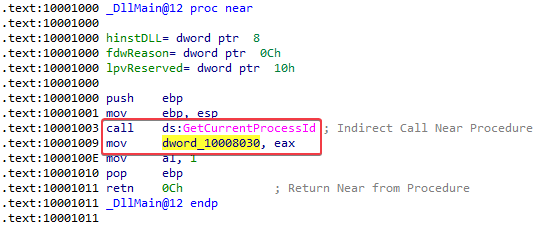
7. While running or debugging the program, you will see that it prints out three pieces of mystery data. What are the following: DLL 1 mystery data 1, DLL 2 mystery data 2, and DLL 3 mystery data 3?
Answer: The mystery data is as follows:
- DLL1
- Current process ID
- DLL2
- File handle to
temp.txt 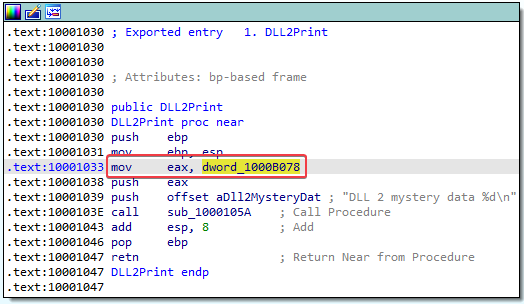
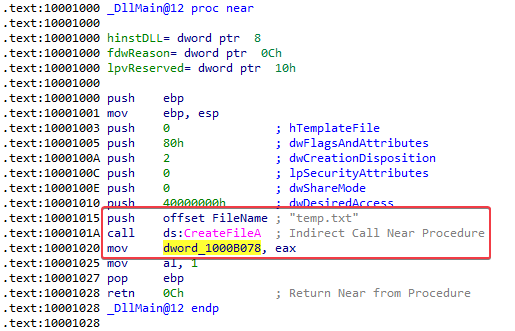
- File handle to
- DLL3
- String that contains
ping www.malwareanalysisbook.com 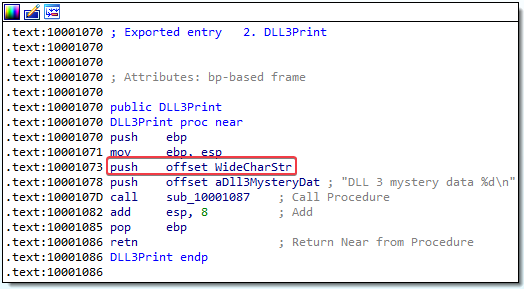
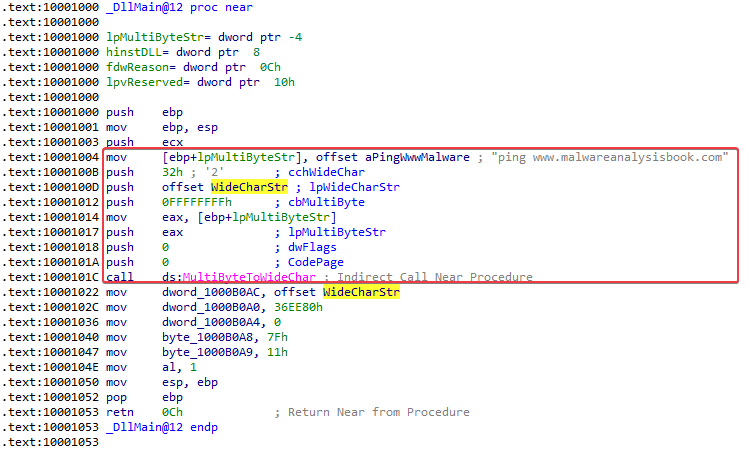
- String that contains
8. How can you load DLL2.dll into IDA Pro so that it matches the load address used by OllyDbg
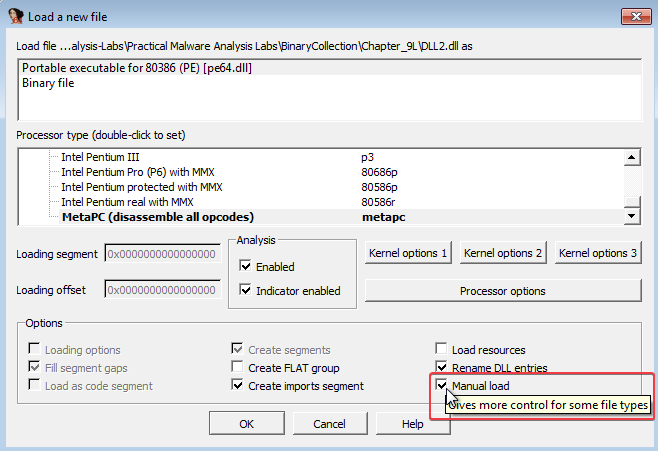
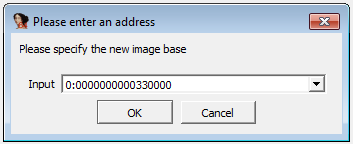
Answer: As we already discussed in question 3, DLL2.dll has a load address of 0x00330000 in OllyDbg. To match this in IDA, we have to select manual load and specify the new image base:
Comparing my answers to the Lab 9-3 solutions
Conclusions after comparison:
- We could have applied the
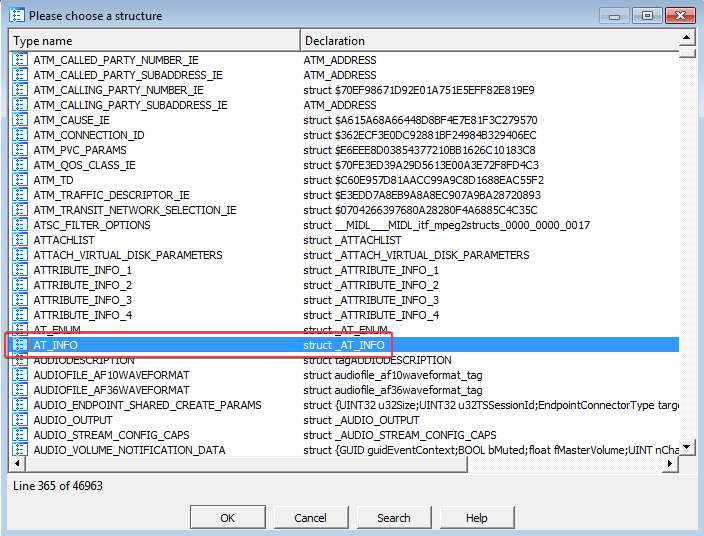
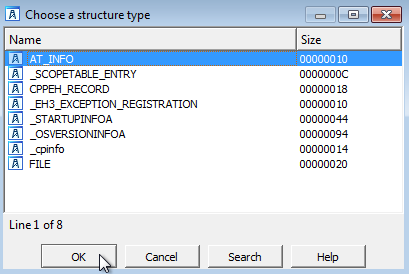
AT_INFOstructure to the data inDLL3.dllas follows:- Press [INSERT] while having the Structures window open and add the standard structure
AT_INFO - Next, open the dword_1000B0A0 in memory
- Then select Edit –> Struct Var and click
AT_INFO - This will cause the data to be more readable!
- Press [INSERT] while having the Structures window open and add the standard structure
